Quarky is STEMpedia’s programmable robotics board. It works with the PictoBlox coding app; its technical specifications list the sensors, LEDs, motors, and other hardware on the board. My brother had one lying around. People mostly use it to make basic projects with PictoBlox’s Scratch-like blocks, and one day I decided to try something of my own with it.
I wanted to use Quarky as a small controller for side projects. First I needed to find out what ran underneath PictoBlox and whether I could write firmware for the board myself. I chose a web server for the first experiment because it could use the ESP32’s Wi-Fi without requiring me to map every sensor and motor first.
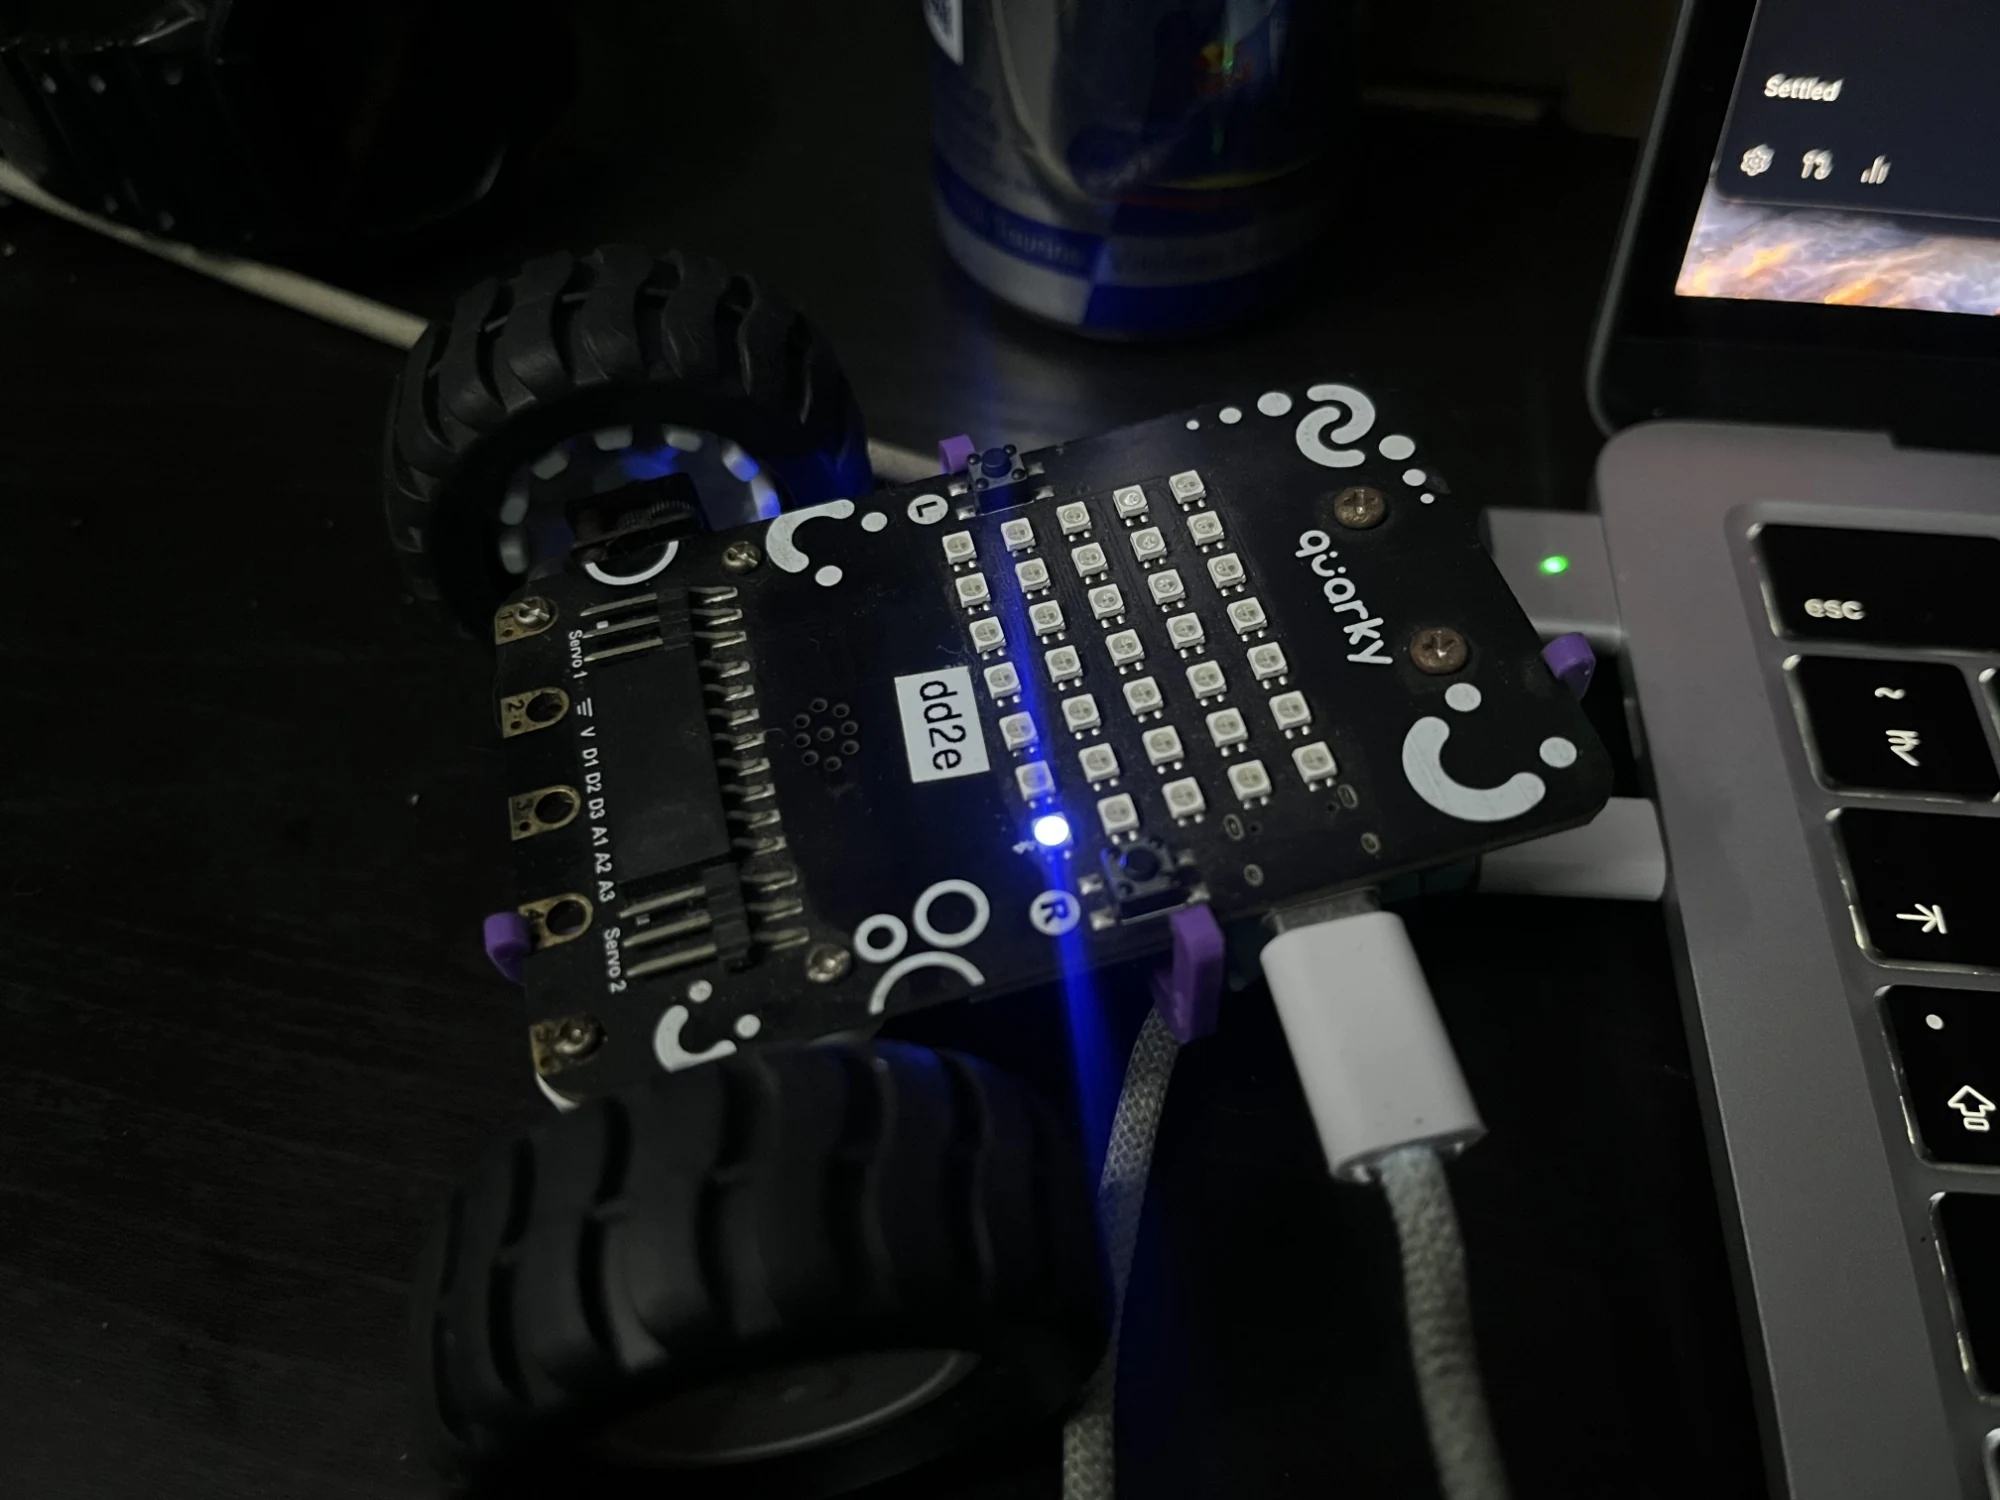
First, what is inside Quarky?
Quarky’s core is an ESP32. I connected the board to my Mac over USB-C and queried the chip. It identified as an ESP32-D0WD-V3 and reported 16 MB of flash. I could build an Arduino-style program for that chip and use its Wi-Fi directly.
The official Quarky documentation lists a 7-by-5 grid of 35 RGB LEDs, touch and infrared sensors, a speaker, Wi-Fi, Bluetooth, and digital and analog pins. The technical specifications also describe the motor and servo connections. I have not tested those components with my firmware yet; they are possible next experiments.
Before changing the application firmware, I read the full flash and saved it outside the portfolio. The 16 MiB dump can contain board-specific settings, so I keep that backup private. The partition table divides flash into areas for applications, settings, and a filesystem. A previous probe wrote a 4 KiB marker at 0xe38000, inside the VFS partition. I recorded that separately and kept both the marker and full backup; flash offsets are tied to the partition layout, so they are not interchangeable.
Looking inside PictoBlox with REA
I used REA to inspect the installed PictoBlox app and organize the reverse-engineering work. The app showed how a computer communicates with Quarky over USB serial and Bluetooth. It also contained the firmware-upload flow and Quarky-specific command definitions.
Commands and replies use different packet formats. A host message starts with FF 55, then carries a length, group, operation number, and payload. A board reply also starts with FF 55, but its next byte gives the value type. Replies end with 0D 0A.
I noted the two formats before interpreting any captures. PictoBlox’s code also exposed operation numbers for motors, servos, LEDs, and stop commands. Those numbers show what PictoBlox can request. I still need to validate each command against the board, so this web server leaves actuator commands alone.
Replacing the usual interface with my own
I built the first custom firmware with the Quarky board target included in PictoBlox’s Arduino and ESP32 toolchain. The sketch starts a password-protected Quarky access point, joins my home 2.4 GHz Wi-Fi, and runs an HTTP server on the ESP32.
The page is one small HTML file with plain CSS and JavaScript. It requests GET /api/health and displays the board name, chip, uptime, free heap, access-point client count, and home Wi-Fi state. The endpoint returns JSON that I can also inspect with a browser or curl.
I embed the compressed HTML in the firmware image, so Quarky serves the page directly. The build turns a 4,112-byte HTML file into 1,664 bytes of gzip data before placing it in the sketch. The compiled application used 694,390 bytes, about 10.6% of the Quarky board target’s 6,553,600-byte application space. The resulting .bin file on disk was 694,496 bytes; the small difference comes from how the build summary and flash image account for the image. I flashed only the application partition at 0x10000; I did not erase the rest of flash or overwrite the saved backup. The flashing tool reported that the written image hash was verified.
The memory numbers, in context
These figures describe different things: SRAM is working memory, flash stores firmware and other persistent data, and the page size measures the web content. They answer different questions about the project’s footprint.
| What I measured | Amount | What it means |
|---|---|---|
| Quarky flash | 16 MiB (16,777,216 bytes) | Non-volatile storage on the board, reported by the chip and selected in the Quarky board profile. |
| ESP32 on-chip SRAM | 520 KiB (532,480 bytes) | 320 KiB of DRAM and 200 KiB of IRAM. The Quarky build profile has PSRAM disabled, so I am not counting any external PSRAM. |
| App partition | 6,553,600 bytes (6.25 MiB) | Maximum size of the application slot used by this build, not the whole flash chip. |
| Custom firmware | 694,390 bytes in the build summary; 694,496-byte .bin | About 10.6% of the app-slot limit. The binary includes the program, libraries, and embedded page. |
| Page before compression | 4,112 bytes | The complete index.html, including its CSS and JavaScript. |
| Embedded page after gzip | 1,664 bytes | The compressed page payload stored in the firmware and served with Content-Encoding: gzip. |
| Static/global data in build report | 38,020 bytes | What the compiler summary says the program’s global variables use. It is not the same as free heap while running. |
| Free heap in one live response | 277,952 bytes (about 271.4 KiB) | A snapshot after Wi-Fi and the HTTP server were running. It changes as the firmware allocates memory. |
Espressif’s ESP32 memory guide describes the chip’s SRAM layout.
The Arduino build output also reports “maximum dynamic memory” as 4,521,984 bytes. In the Quarky board definition, that value comes from upload.maximum_data_size; it is a configured tool limit, not a measurement of physical RAM. It exceeds the ESP32’s 520 KiB SRAM, so I use the live ESP.getFreeHeap() value to describe the running sketch. That reading is still just a snapshot and changes as the program runs.
This part of the health handler reports the free heap and home Wi-Fi state. The handler also includes uptime and the number of access-point clients:
json += ",\"free_heap\":";
json += String(ESP.getFreeHeap());
json += ",\"home_wifi_connected\":";
json += WiFi.isConnected() ? "true" : "false";
The page requests that endpoint from the same host, whether I open it on the home network or through the public URL:
const response = await fetch('/api/health', { cache: 'no-store' });
const data = await response.json();
document.getElementById('chip').textContent = data.chip;
document.getElementById('memory').textContent =
  `${Math.round(data.free_heap / 1024)} KB`;
The ESP32 serves the compressed page and the JSON endpoint itself. The browser turns the response into the status view, with no separate app server involved.
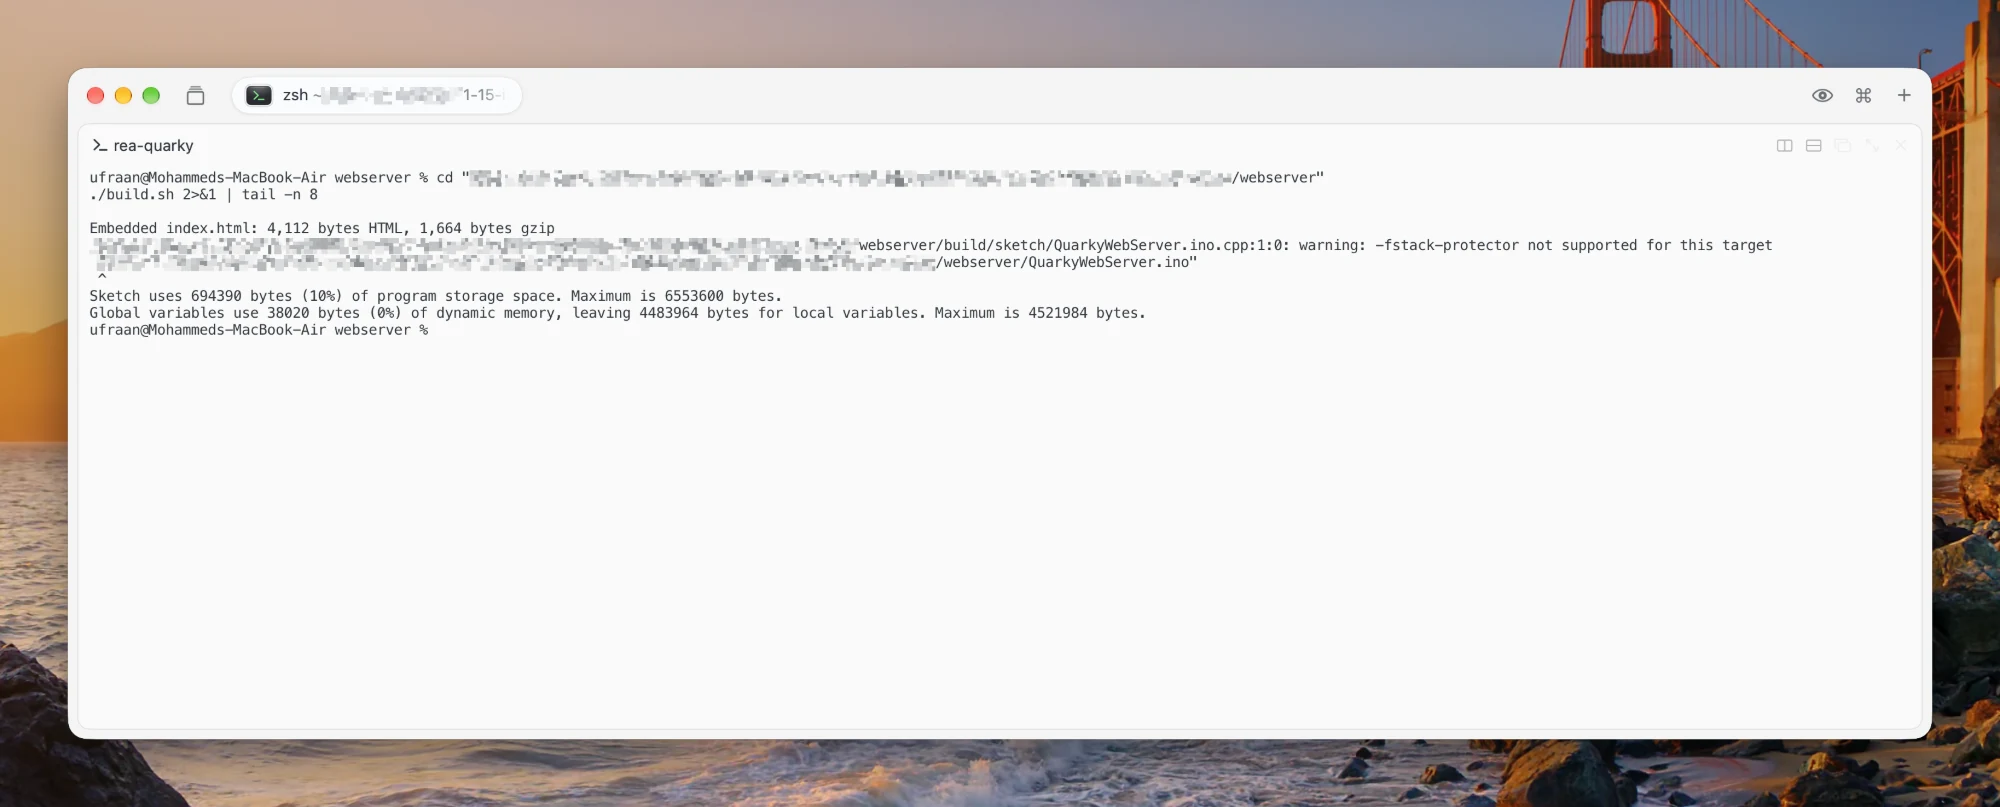
This first page is deliberately read-only. It tells me whether the board is up and gives me a simple baseline before I add code to read sensors or drive the LED matrix. Keeping the initial firmware small also makes it easier to understand which parts are mine and which parts belong to the vendor software I inspected.
Checking it on the home network
I connected Quarky to the 2.4 GHz home network and checked the address it received. It joined successfully at 192.168.0.101.
That address only works inside the home network. From a device on the same Wi-Fi, I can open http://192.168.0.101/ and load the page Quarky serves. The screenshot shows its chip identity and Wi-Fi status.
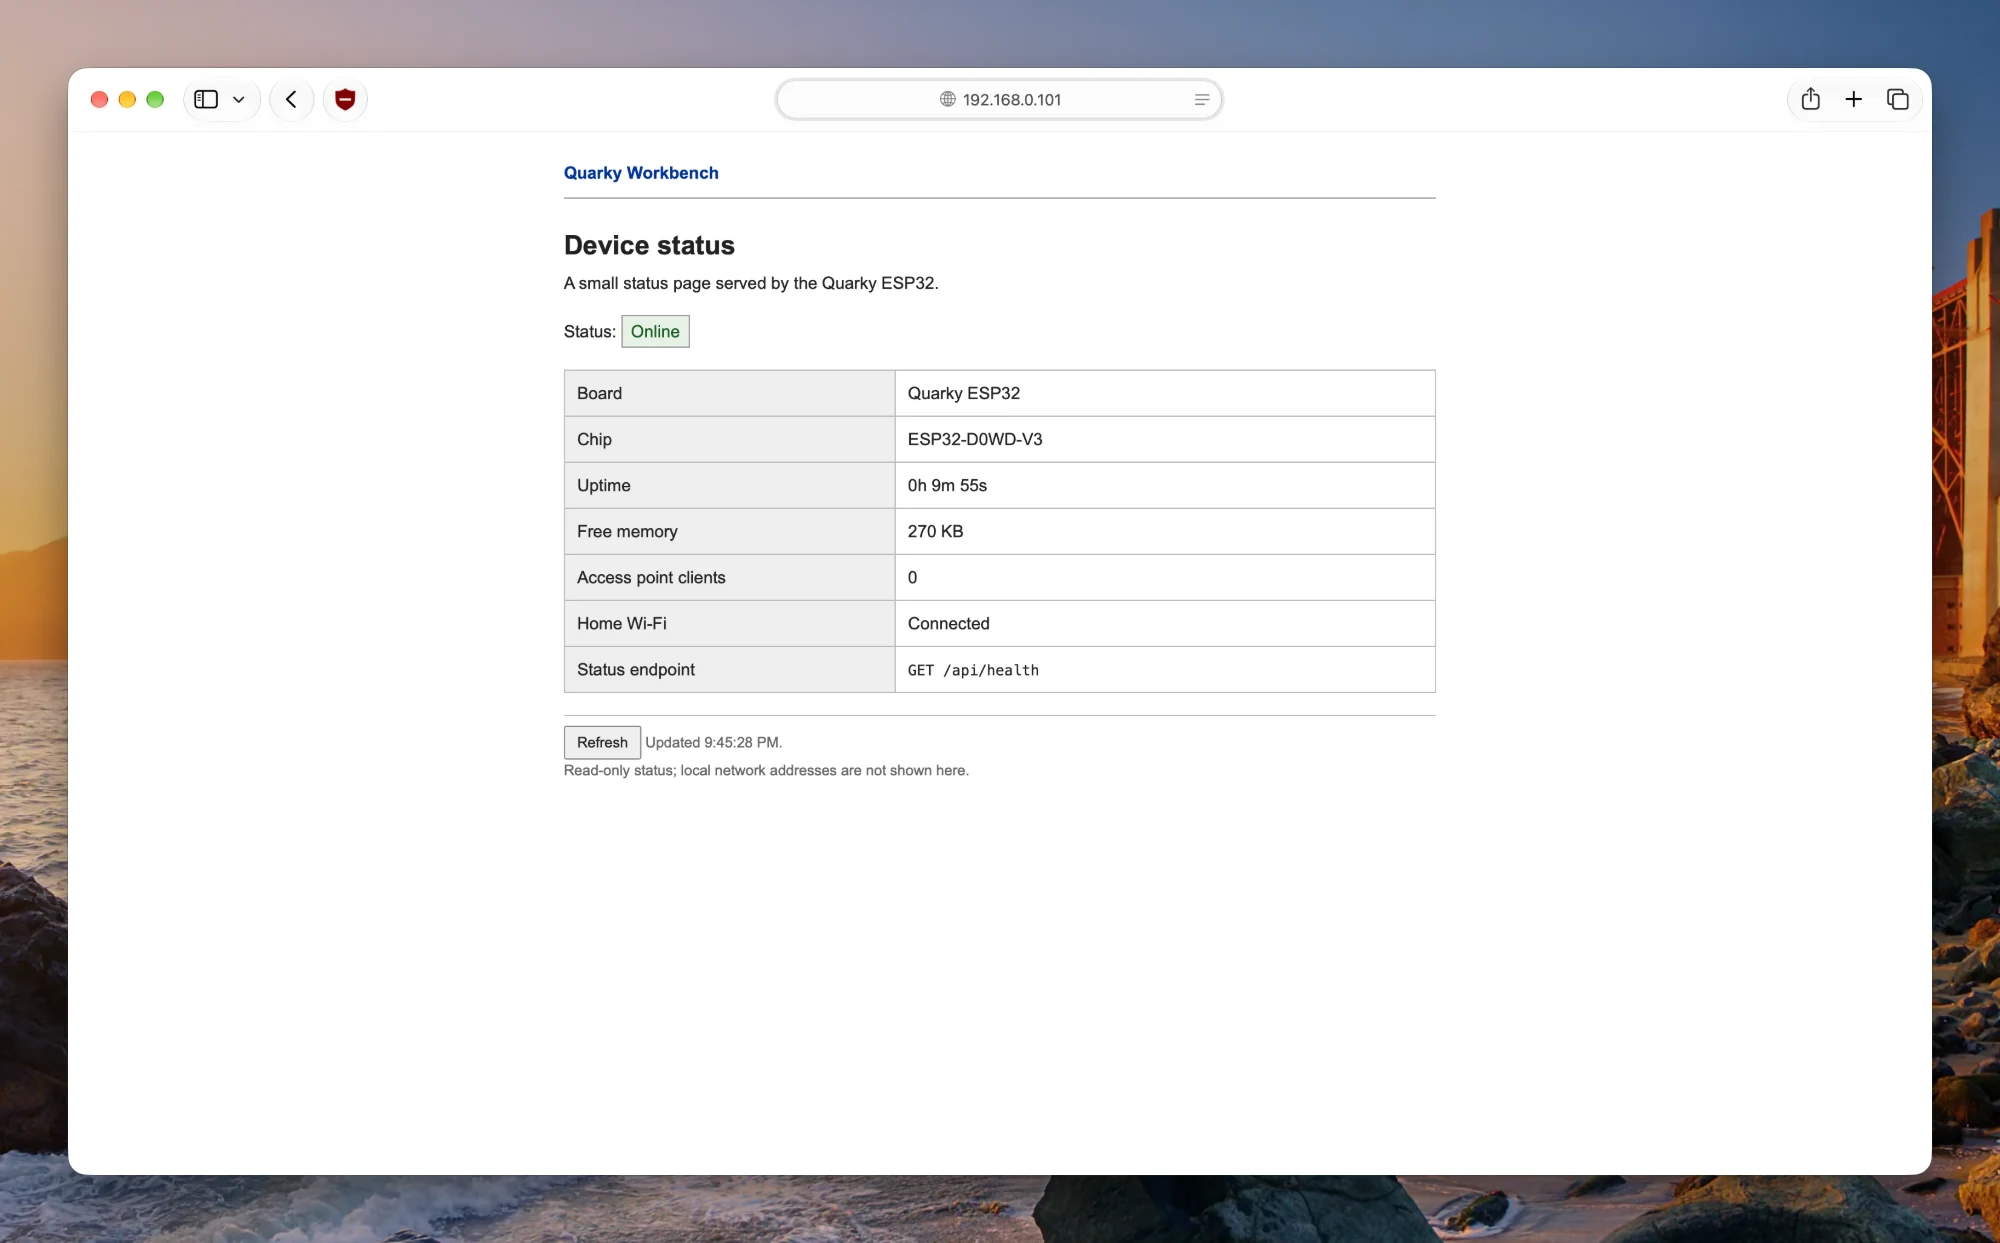
The page refreshes the health data every ten seconds and has a manual refresh button. It shows whether the firmware booted, joined the network, and can answer HTTP requests. That gives me a quick way to check the board before I start debugging another project on top of it.
Taking it one step further: a public URL
I wanted to take the project one step further and make the status page accessible via a URL. Since I already had a domain on Cloudflare, I used an outbound Cloudflare Tunnel.
Requests travel from the browser through Cloudflare Tunnel to a read-only relay on my laptop, then to Quarky’s HTTP server over home Wi-Fi. Quarky serves the HTML; the laptop forwards requests and keeps the tunnel connected.
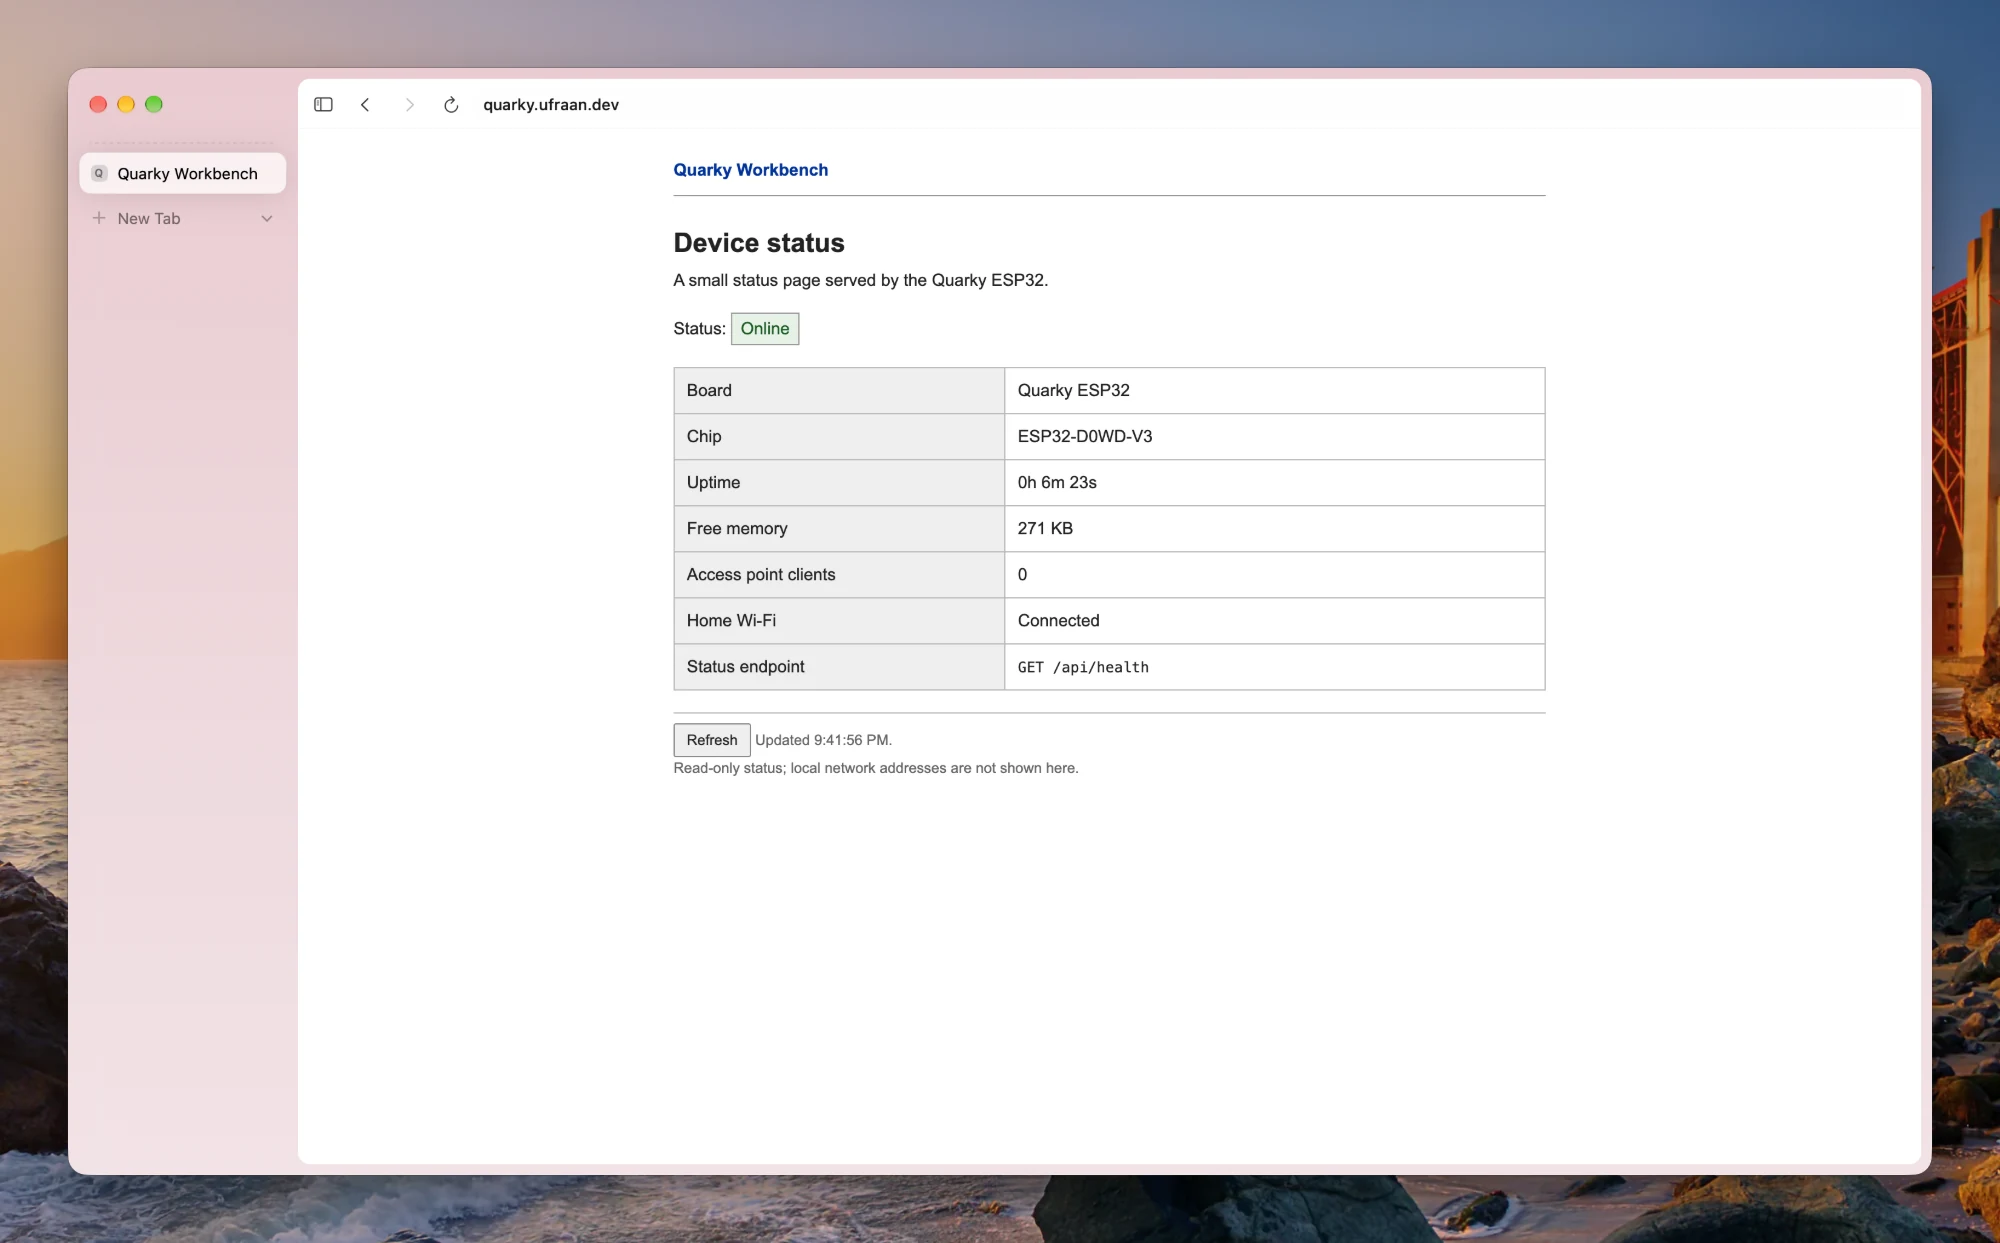
The public address is https://quarky.ufraan.dev. The tunnel connector and relay run on my laptop, so it has to stay powered, awake, and online for the URL to work.
Testing what the public address exposes
I used curl to check the public health endpoint. It returned HTTP 200 with the board identity, uptime, free heap, access-point client count, and home Wi-Fi status. Before returning the JSON publicly, the relay removes the board’s local IP fields.
curl -i https://quarky.ufraan.dev/api/health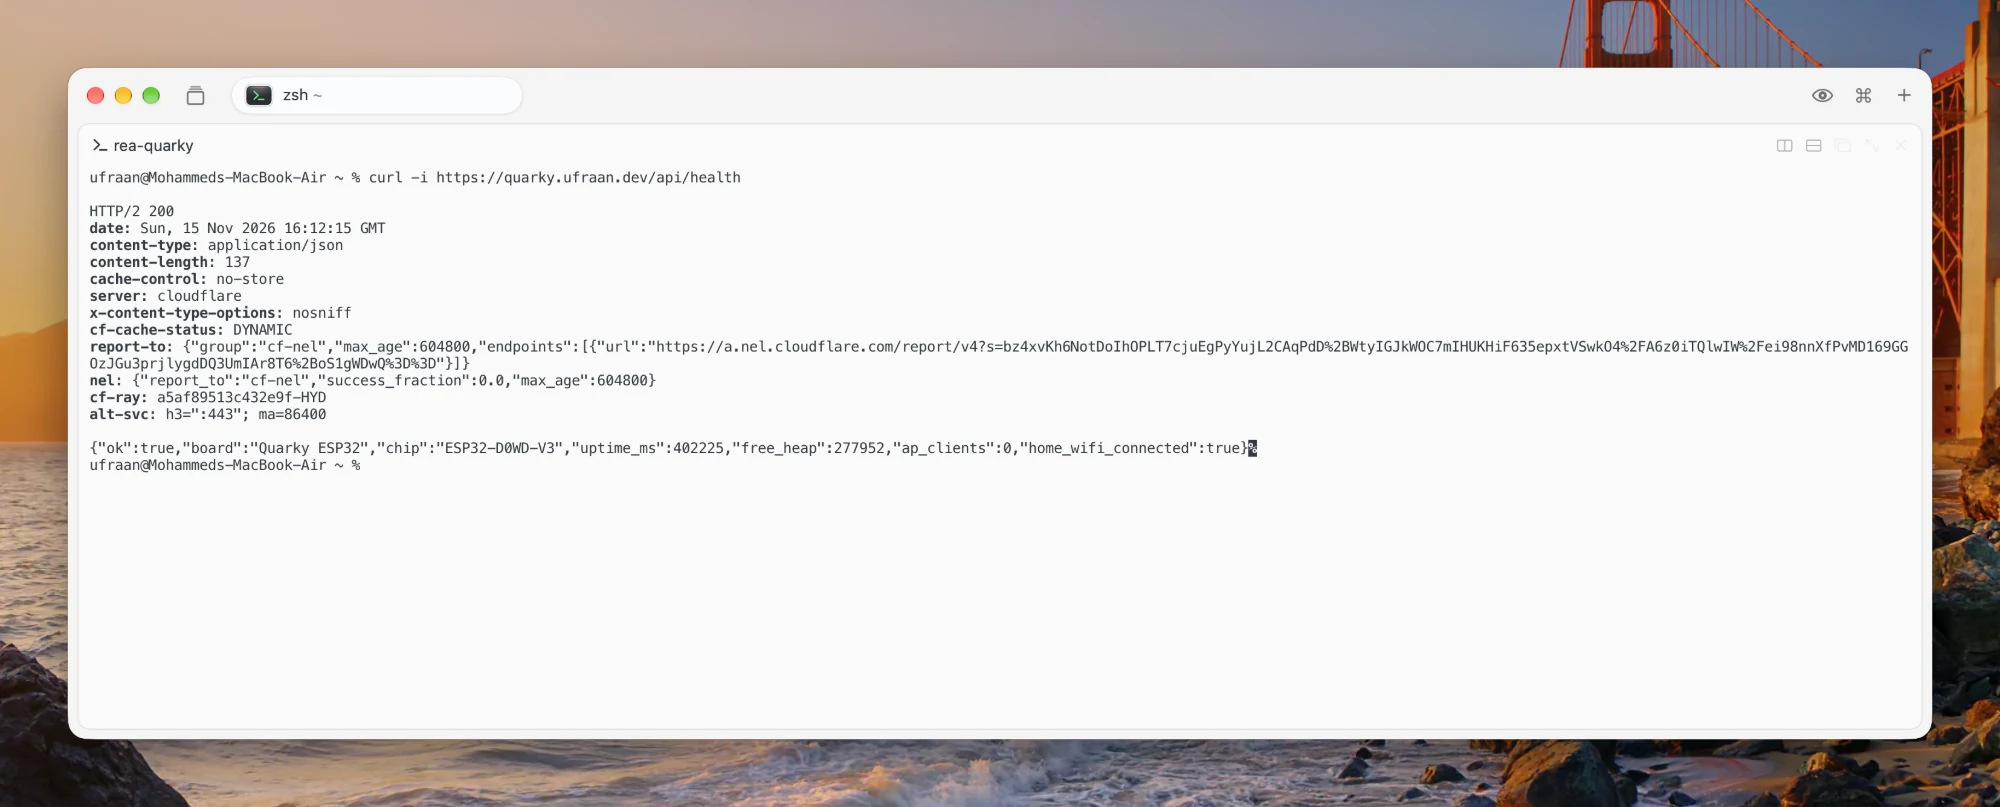
The response came back with the board’s current status, confirming the route through Cloudflare, the laptop relay, and Quarky. The relay keeps the board’s private LAN address out of the public response.
I also sent a POST request. The relay returned HTTP 405, so this version has no public write route for motors or other hardware.
curl -i -X POST https://quarky.ufraan.dev/api/echo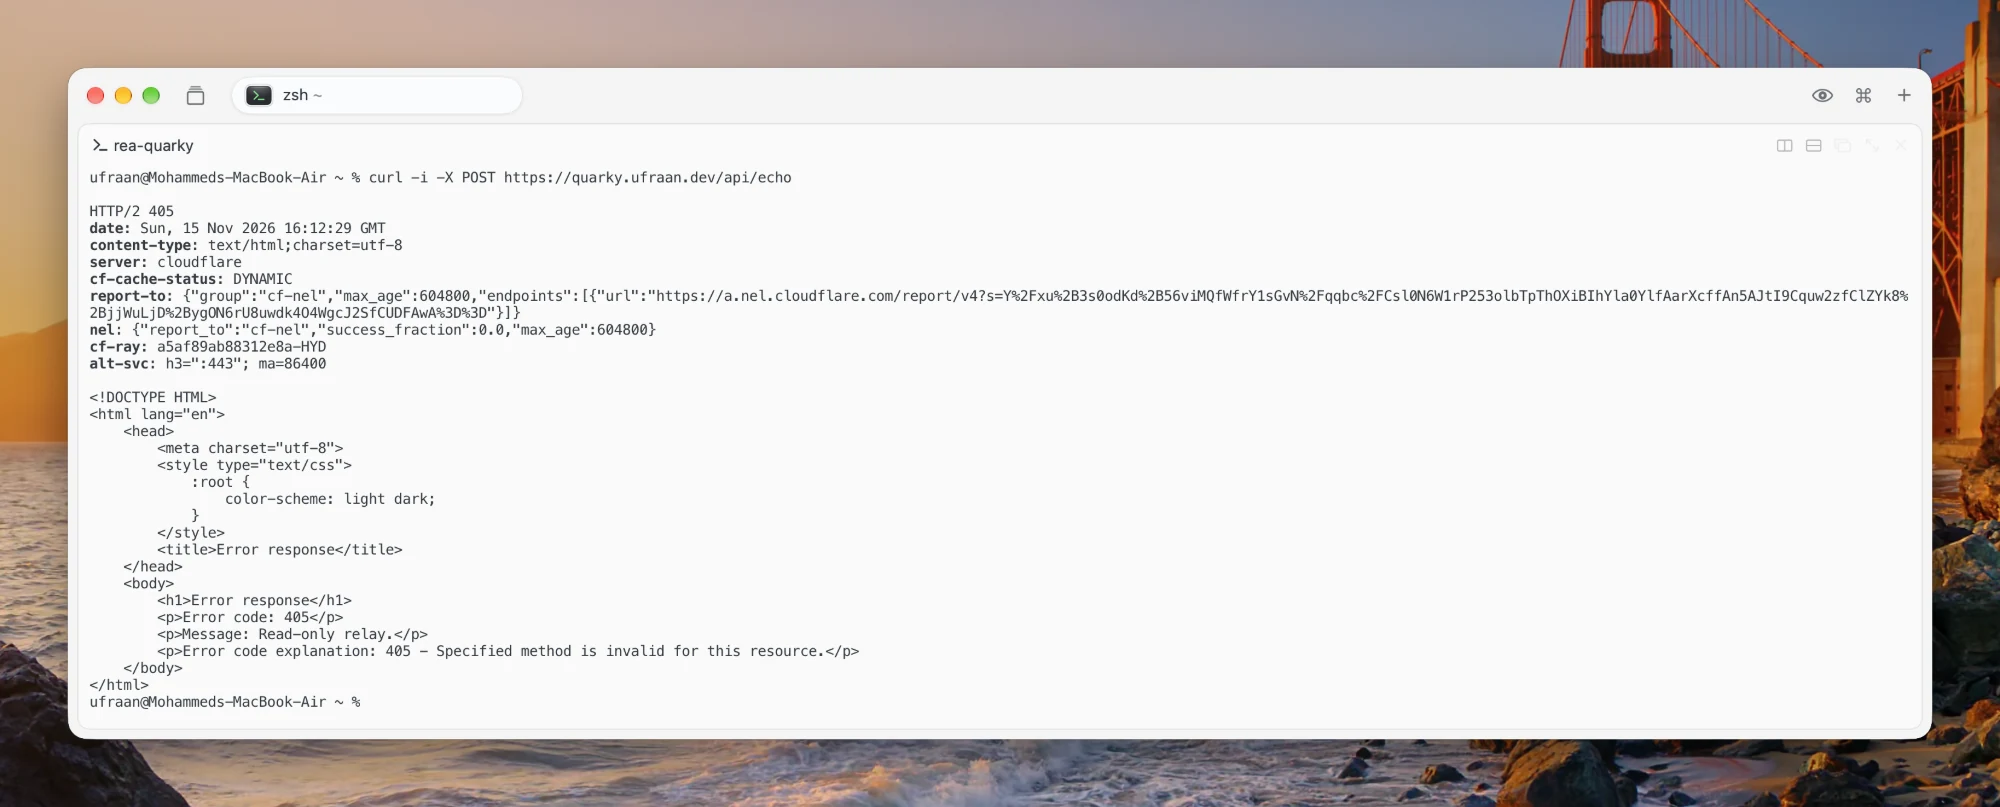
Remote actuator control is still unimplemented. Before exposing it through the tunnel, I would need authentication, strict input checks, and a physical stop procedure.
What works now, and what I want to try next
The custom firmware builds and runs on Quarky. It serves the page locally, joins home Wi-Fi, and answers the public health request through the laptop relay and Cloudflare Tunnel. The relay rejects the POST request.
I have not yet used this firmware to read the touch or infrared sensors, draw on the LED matrix, play sounds, or run a motor. Those are next on my list. I need to map the pins and drivers, then test each feature locally before adding it to the web interface.
What I learned from the experiment
Quarky’s block-programming workflow is only one way to use it. The ESP32 underneath can run a custom sketch, join Wi-Fi, and serve HTTP. REA helped me find PictoBlox’s host-to-board protocol and command definitions. I still need to test those commands on the board before relying on them; this firmware reports status and leaves the motors and sensors alone.
I had to keep flash, RAM, the app partition, and the compressed page size straight; each describes a different limit. The private 192.168.x.x address works only at home, while the public URL relies on the laptop relay and tunnel staying online. I also came away with a clearer record of what I measured, which firmware partition I changed, and which hardware behavior still needs testing.
| Area | What I learned |
|---|---|
| Hardware | Quarky’s controller is an ESP32-D0WD-V3, with Wi-Fi, Bluetooth, 35 RGB LEDs, sensors, audio, and motor/servo connections documented by STEMpedia. |
| PictoBlox protocol | The host command packet and board reply packet are different formats. A command list from the app is evidence of what PictoBlox can send, not proof that I have tested every operation on-device. |
| Firmware | The Quarky board target lets me compile a normal ESP32 sketch. I can replace the usual block interface for my own experiments while keeping a full flash backup. |
| Web server | A compressed, embedded HTML page plus a small JSON endpoint is enough for a useful live status dashboard; no separate web hosting service is required on the LAN. |
| Remote access | A private LAN address is not internet-routable. An outbound tunnel and laptop relay make the public URL reach Quarky; the laptop must stay online. |
| Safe iteration | Start with read-only status, confirm the firmware and network path, then add one hardware feature at a time after validating its pins and behavior. |
My brother’s unused board now runs a small web server that I can inspect and change. I can build from here and start testing the rest of Quarky’s hardware one part at a time.